This year the only halloween thing I did, other than some at home fun with the kids, was a carnivale night at the local amusement park. I decided to use my costuming as the basis for my spooky look and go as a victorian dead lady. It was a great excuse to wear my natural form walking suit again but it one problem, it is thin cotton and it is cold here this time of year! Well perfect excuse for a new project (as if I don’t have enough this fall)! I was going to make a riding habit, something that would work with both my costuming and everyday wardrobe. My starting point was prior attire’s lovely book, The Victorian Dressmaker and their pattern for a 1885 riding habit. I loved the asymmetrical opening on it but wasn’t sure I wanted the braiding. I still haven’t made up my mind about it so for now I left it without. Maybe I’ll make another at some point with a few changes and some braiding.
Well since my version needed to be wearable both in corset and without and my measurements are very different from hers to start with I drafted my pattern based on my corseted measurents but made it so that the hip flare starts just before that smallest part of my waist.
I fitted it over my corseted body with my walking suit on and then double checked the thing would close when wearing modern things under. Then it was just a mater of sewing the thing up from a lovely soft wool coat fabric I’d been holding onto for a few years. Everything else is machine sewn as we are well into the era of sewing machines with this one but buttonholes are hand finished as they would be at the time. And the sleeves I sewed on by hand. Honestly I don’t think that thick wool pleated at the back of my arm would have fitted under my sewing machines foot. It is lined in a thrifted vintage bedsheet to keep up with the thrifty theme (the jacket wool was also thrift find) so I only bought new the buttons and the cotton bias tape that I used to finish the edges.
All in all I’m very happy with this one. It is my new favorite fall coat and I wear it nearly daily. Maybe even one of these days I’ll bother with finishing the inside raw edges but for now I’m being lazy and focusing on new makes lol.
Here comes the picture overload 🙂
Oh and I almost forgot that I added the hem ruffle from last time I wore this skirtthe sleevecap isn’t actually that different from the original, the extra pooffyness is due to the ease I left in the sleeve to work better with my regular wardobeI really loved how my hair turned out, I did it based on a 1880s fashion plate complete with bow bun made out hair and all! too bad I forgot to take any proper hair pictures
And here me in my uncorseted everyday vintage/history bounding look accompanied with 1940s ski pants.
I’m off to sew some 18th century now but I’ll leave you with one last creepy picture to keep you warm!
One of my big projects for this fall is making 1830s outfits for a Christmas event for me and my kids. And yes since it’s partly outdoors and we live in a cold climate that means outerwear aswell! I’m going pretty much full steam here and now my sons costume other than the coat and cravat are done. When we originally talked about doing the 30s with the kids my son got super exhited about the big pooffy sleeves at once and he wanted the biggest gigot sleeves out there. My daughter not so much so she is much more a challange to costume for this one but more on that later… We set off looking at pinterest and right away he found what he wanted.
these type of pants and jacket but the jacket cut higher was his wishthe neckline and shirt more like thissomething like this for the outside look but a top hat more like the man than the boys one
Well with such a clear vision we went over to my fabrics and looked if we could find something there. He chose a lovely checked wool I had had for a few years after finding it at a recycling center but the piece being too small for anything for me.
Then for the jacket he wanted black velvet. Well I had a black velvet cloak I made in the mid 00s for fancy dress. Back then I couldn’t find anything but modern patterns for such a garment and the shape of it never really pleased me so it just waited for 15 years for me to do something with it or get rid of it. Well here was now that project. Sometimes it pays off to hoard things, lol!
it always had that wierd gap at the top and the hood shape was wrong but it was good quality velvet
The pants are patterned based on the 18th century breeches I made for him just made longer into pants and added the extra material in the front for those pleats and made the drop front smaller.
I pleated the front to the waistband on him. Very trying on 6 year old nerves 😀
The jacket sleeve is just a scaled down version of the round sleeve in work woman’s guide published in 1838 and found on google books, the best guide to period correct garments for this era. I also made him little sleeve pumpers based on my adult versions patterned based on the american duchess pattern they are kind enough to give for free on their blog and their sewing is hard youtube videos. I mocked up the sleeve and was happy with it from the first try.
my plumper on the left for comparison
Next came the body for the jacket. I used my daughters 18th century gown as my base (they wear the same size of clothing eventhough there is a 2 year age gap) and just adjusted to my liking. Again everything fit perfectly the first time other than the side back pieces being a bit large, I really am on a roll with my drafting this fall! This time around I cheated and sewed the jacket mostly by machine, the sleeves are gathered by hand and backstitched onto the jacket, the backs are lined by hand and all the edges finished by hand. Oh and buttonholes are hand sewn. Well actually I guess that makes it more like 50 percent hand sewn but oh well.
even these kid size sleeves are huuuuge the fronts are lined in the same velvet and the back in left over ikea bedsheet from previous projects here you can really see how tightly gathered this thing is all the way around the armscye here is the sleeve plumper in place hanging by it’s tapes (there is a pice of bias tape at the elbow and one at the shoulder on the jacket and pieces of bias tape sewn onto both sides of the plumper and when tied on it keeps the pumper in place for your arm to go in and you not having to worry about them moving about as you do) in this one You can see the pleats really well that form on the sleeve… well as well as you can on black velvet anyways
The shirt is just his 18th century one though IF I have time I will make him a regency/romantic era one also, the only real difference being a higher collar.
Well that’s all for now, I’ll be back with some romantic era under pinnings soon!
I love the 1780s! One of my favorite things about the decade is all the wacky doody accessories. There is just sooo much going on in that time and lot’s of it feels like they just drew out the wierdest hat they could and then made it. There is a ton of experimenting going on there that leads to really fun fashion. Here are some of the things I love about the 80s https://www.pinterest.cl/mariaviljanmaa/1780s/
2 days before this summer’s 18th century picnic I realized that the hat I had made earlyer was going to be on my daughter’s head there so duh I couldn’t wear it at the same time. And I thought I was all ready in time for once! So off to pinterest I went in search of a hat to make fast. I settled on these wierd gigantic lamp shade looking hats beacause they seemed like a fairly easy make but a major statement piece and a style fairly rarely seen in costuming compared to some other styles.
The next day I headed to the hardware store and bought some wire cable and cut it into a the size I wanted my brimm to be and the size of the base of the crown. I used heat shrink wrapping to keep the ends slight ontop of each other forming a nice firm circle. Then I cut a piece of buckram into the same width as my brimm hoop and 8 1/2 iches tall, folded the bottom around the hoop and whipped it on with linen thread.
Then I cut the buckram almost to the whipped edge every 8 to 10 inches or so and pinned them on to each other so that the top edge made the size of a circle that my crown wire hoop was.
Then I whipped the pieces onto the wire and whipped the flappy bits to the base.
this is done quick and dirty as none of this is visible on the finished hatsee it looks exactly like a lamp shade! 😀
Next I cut the inner fabric to the same width as the buckram but 12 inches tall and whipped the botton edge around the wire eased it to the crown circle size, pleating as I went and whipping it around the wire leaving the extra length to come up from the hat. Then I did the same with the outer brimm fabric only this one I left 16 inches tall since that’s how much I had bought. This time though I folded the bottom over the brimm to the inside and hemmed it on the inner fabric and the whipped the top circle catching both the wire and the inner fabric.
Now I had this wierd floppy tube at the top that will add fluffyness to the finished crown.
in the middle of the night desperately making my hat so the quality of these phone pics is not great 😀
Then I grabbed some light weight linen I had and cut it into a big circle, well as close to a circle as I could freehand at 2 am! No idea how big it was but my guess is about brimm size. Yes if I had been thinking straight I could have used the brimm as a cutting guide but at this point I was just mindlessly making. The circle then is pinned evenly around the crown wire and very crudely gathered and stitched on with a small fold so that the raw edge end up inside the hat. Really even if I wasn’t in a huge hurry this stitching really does not mater what it looks like as long as it’s done as it’s covered by the band anyways.
Then since I didn’t have any super wide ribbon lying around I cut 2 strips of the lining fabric sewed them into tubes and tied them into a fancy bow at the side front. I thought about attaching it with a few stitches but decided against it thinking I’d like to tie it in differnt ways in the future. At this point I gave up. It was wearable and the last hours of the night were dwindling away so I just went to bed and wore it as is.
The day was great and I loved my ridiculous over the top hat.
Ahterwards I cut a piece of that same linen I used for the crown in the width of that crown wire plus a small seam allowance and 4 inches tall. I turned and basted one long edge and both short edges. Then I folded and pressed the raw edge of the left over long edge and turned again this time 0.5 inches in and hem stitched it onto the fabric leaving a channel for a narrow bias tape. Next I pulled the tape through and placed the lining inside the crown applique stitched it in and whipped the edges together leaving the tape to move freely. Now I pulled the tape to tighten it and tied it and finally it was all done.
Now for the next event we had I wore again the same dress, my 1780s round gown but since it was at a museum and involed dancing I figured a cap might be a better headwear option. I had also bought the American duchess 18th century beauty guide book this summer and it has soooo many wonderful caps that I just had to make something.
we danced at the picnic too and granted my hat wasn’t pinned with proper hat pins, it flopped oddly as a result of the twirling
I decided to make the early 80s togue style since I had some kerchief weight linen lying around and many of the other styles I wasn’t to use either cotton organdy or silk organza for. I’m not going to bother with construction details on this since it’s all in the book but I will say it was a fun quick make, took me only little more than one evening to finish. Without the big pooffy hair this really looks like a wierd version of a modern sloughy cap so probably not the best style if you want something to wear instead of fussing with hair.
my hair is also done using the american duchess guide with a cushion from the book as well
The finished cap looks to me like somnething between a turban and a doily plomped onto my head but in a good way.
I love both of these pieces and plan on making many more or the fun styles this decade provides. It also helps keep costuming interesting with minimal effort or resourses, new millinery makes an old gown seem new again! Not that I really have any old gowns yet as I’m just a year into this amazing world of 18th century costuming.
After making my silk italian gown https://sewthroughtime.home.blog/2019/05/10/belles-italian-gown-construction/ I really wanted one out of cotton or linen to have an easily washable version for frolicking about with kids and for picnics and such were spills and other little accidents can happen. Sure I have my cotton caraco but I was never really happy with it eventually I did discover why, the style I had been after when I first desided to make 18th century garments was the polonaise not a caraco but more about that later… Anyways after making my daughters gown https://sewthroughtime.home.blog/2019/07/03/young-girls-18th-century-gown/ I had quite a bit of the duvet left eventhough I had bought the smallest one so I wanted to use that up. I am a firm believer on using as little resourses as possible for extra things like costuming, I don’t want myt hobby to have a huge negative impact on the environment. So when I buy something new I try to use it all and only buy things from sustainable sourses when ever I can.
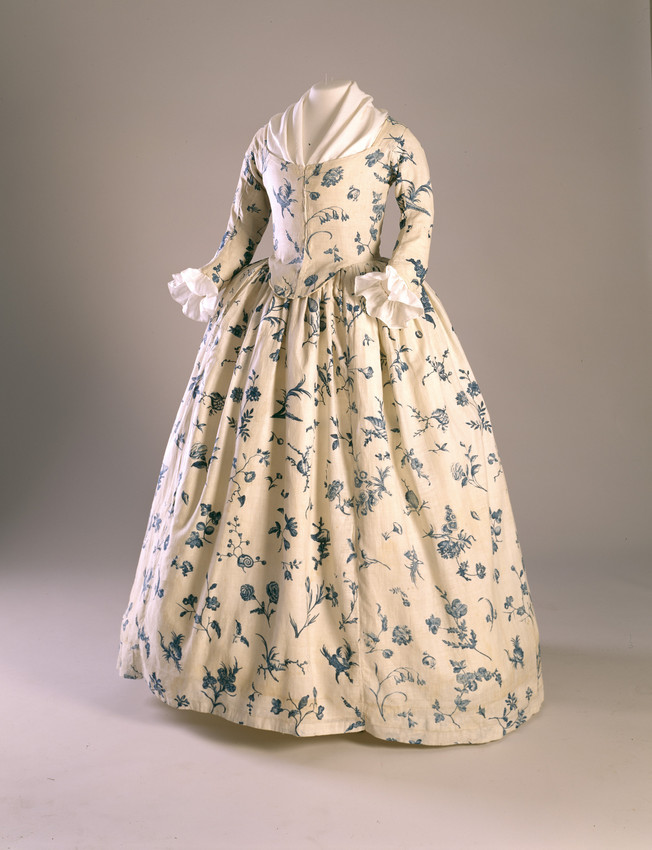
Going through extants I completely fell in love with this one and how similar it seems to the ikea duvet. Sure the flowers and arrangement is different but the overall feel reminds me of it.
After reading the story behind the dress I just had to make it and luckily it was a round gown so I thought I could just eek one out of the leftovers making my costuming also more eco friendly with using up all the material I buy. If you don’t know Deborah’s story I highly recommend you read about it. She was an extraordinary woman who dressed as a young man to be able to serve in the continental army in the American revolutionary war.
I figured since I already had a pattern fitted to my measurements making this would be so easy and straight forward that I could do it easily in a weekend. Well yes kinda it could have… but wasn’t. 😀 Is it ever? First of all the back needed to be refitted to the side. I thought I must have just made a mistake drawing the back into 4 pieces for this one instead of the 2 my previous dress had. That really should have been my first clue that there is something wrong here. Well then my second mistake came from fitting this over my old stays that were of an earlyer siluette and weren’t well fitting on me. I was making new stays at the same time but I figured I can finish the gown and then sew the stay pieces together. The third was that I pleated the skirts half way around the bodice for the back and pleated the rest onto a linen tape that then ties at my waist before pinning the gown on leaving pocket slits at the side and the front bodice to dip lower than the skirts. Sure the basic idea is good, it’s how many extant round gowns are made but with the shape of my bodice the sides come slight higher than my narrowest part atleast in these new well fitting stays so there is gap at the sides. The problems that came with fitting the gown over the old stays were that these new ones being 80s stays already have some forward thrust at the chest when the previous ones were straight. That ofcourse means that my gown is very tight in the chest and very hard to pin on. The other problem came when I tried those new stays on. Somewere between measuring myself for the stays and making them I had lost weight, 2 inches off my waist! 2 inches completely changes the fit of things. Well I got the stays salvaged luckily but ofcourse this meant my round gown is now also too big in the waist, so I’m left with hardly any overlap at the top and with a huge overlap at the bottom so at this point I realized that that first mistake I thought I made in drawing the pattern wasn’t actually a mistake but a clue that something had happened to my body. So for that first picnic I wore stays that were missing the binding and my gown was not only pinned in the front like normally but also pinned at the sides to keep the front up so that the waist tape and my stays wouldn’t show.
I made this hat specifically for this picnic, I’ll post about it soon 🙂
I did like the gown though so I ripped the front part of the skirt off the waist tape and sew up those side seams completely and after studying some extant gown pictures I made new pockets slits by cutting the fabric further forward just at the line were the bodice dips for the front then hemmed the slits and pleated the new back pieces into the bodice and sewed them on. Then the front got repleated and sewn onto a new tape as the old ones got destroyed when ripping it out.
the taking it apart bit was not fun at all my tape had a fairly loose weave to it like many modern cotton tapes do and it just kept on braking
To make my life easier I just left the front as is with it’s problems and just put lacing strips on the inside so that I can pull the gown into shape and just pin it to smooth the edges. With the gown finished I wanted to add the sleeve ruffles as the picture of the original has. I used the american duchess guide book for the construction just made them wider.
This time my interier of the gown looks much better than on the italian gown, sure it’s rough but only the historical accurate roughness no goofups on my part.
The gown is lined in a lightweight shirt linen and a very thin linen table cloth at the shoulders for added durability to keep the dress a really light summer dress for hot days. It is constructed using the american duchess book instructions for the italian gown with the added front bit to make it a round gown and the lacing strips.
The gown is hemmed even so that it can be worn without any rump or with the small rump from the patterns of fashion 5 that I posted about in my previous post. It gives a nice lift and that 80s junk in the trunk siluette but without the added pasteboard it really doesn’t require any extra hem length.
Now with all the fixes I wore it again this past weekend to a living history event at a apothecary museum and gentry home were we performed a few dances and brought the past to life for the guests. I have to admit the front bugged me a bit but I still haven’t made up my mind as to fix it or not. I think I’ll leave it as is for now since summer is almost at an end anyways and see what the situation is next summer. Since I didn’t do anything to make the weight loss happen who knows what weight or size I’ll be next year.
with the rump, my shoes are true edwardian and with the luis heel make a decent stand in for late 18th century pumpsand here is the side profile without the rump just my natural junk lol
I’ll hopefully go out tomorrow to trake some stylized pictures with the hat and then post about it and my cap more. For now here are some pictures from the picnic and the museum for you to enjoy.
till next time! xxx
my hair is padded with an early 1780s type of padding made from the american duchess beauty guide book
I think I’ve mentioned before that my first pair of stays wasa not brilliant. They gave a conical siluette yes but it ended up much more like the easy part of the century than the later that I was going for and also it seemed to make much less curvy than I actually am and they were slightly too big on me. And had the tendency of pushing into my chest painfully if I was at all bloated. So when I bought the pattern of fashion 5 I started on new stays right away. If you are into 18th century and do not own this book already I highly recommend you get it, it really will help you understand stays in a new way.
I decided on pattern 25 reversible silk stays because the idea of having two differnt colored sides for differnt occations sounded really appealing to me. Well since I didn’t have the kind of silk I wanted at hand I decided on making first just plain white ones and then if with wear I find something that needs tweaking I’ll have the next pair be perfect.
and in all honesty that picture with the nipples lifted out of the stays intrigued me 😉
I have a very short torso and the original is made for someone with a very long one so instead of trying to resize the originals to fit me I tried using the pattern dafting method mentioned in the book. Since it only a very abbrerviated explanation of the process and a very different one from the more modern corsetry drafting method I was a bit more than slightly confused. After several hours and 3 times trying I got my drawing to some sort of order.
The idea is that you take your measurements and several stays specific ones to determine the outlines and you draw outy the framework for your stays angled like they will when sewn up. I think the biggest problem I had with this is that alot of it is based on the aasuption that you are wearing well fitting stays when measuring yourself and my body is very moldable so all my measurements change quite a bit once in stays. Well once you get the angles right it’s just a matter of drawing out the outlines for the pieces you need then drawing them out onto tissue paper and adding the boning pattern. It all was going along fairly well till I lost weight somewere in between measuring myself and sewing up the pieces. Then after some fiddling about I ended up with too short tabs and having to leave out a hip flare gore so that the sides do not fit as smoothly as one would hope.
As far as construction goes these are first all finished neatly as individual pieces turning in seam allowances between the layers, then boning channels and eyelets sewn in and lastly all pieces whipped together leaving the center front mostly open. Then when you have made sure the fit is what you want it to be you add the ribbon onto the seams and bind all edges.
The originals are bound in silk and have sewn in shoulder straps of the same material as the stays, since I was making these out of a hemp twill I had and both sides are the same color i just put the ribbon on one side and bound them in leather so that now there is clearly a wrong and a right side to them. As for the straps after wearing them half done to a picnic I decided I wanted to do the twill tape straps I’ve seen in some extants and that american duchess did for their simplicity pattern. http://blog.americanduchess.com/2017/12/simplicity-8578-and-8579-two-new-18th.html
and here they are in all their unfinished gloryI had an old leather coat of really thin leather that i think my mom had thrifted some years ago, it was quite grubby and not one that any of us actually wanted to wear so it became to binding
As I was figuring out how to best attach the leather binding I decided to combine elements from another pair of stays in the book that I also want to make at some point and make underarm leather gards as well.
And here are mine all finished up 🙂
When reading the book and wearing my new round gown for the first time (it needed quite a bit of tweaking after the first wear, blog post coming soon) I realized that while I felt like my split rump was a bit much for a more casual daytime look going completely without and dressing as a fashionable 1780s lady was not really the best idea. So I made a new rump from the book, this one being fairly small with a separate pasteboard bottom that could be added if more volume was wanted. I actually still haven’t made the pasteboard bit as I wanted something that gives a more fashionable siluette but wouldn’t take up much room so that hopefully it won’t change the hemm length much. It was a really quick project, took only little over one evening of hand sewing and stuffing with wool.
Here they are all finished up. I tried wearing my under petticoat and rump under my stays as suggested in the patterns of fashion but with my boidy type without the pasteboard extra bit the rump lifts my stays so that the bottom pokes up a bit so unless I’m wearting another fairly heavy petticoat I think I’ll wear my rump over though then it is harder to keep it from creeping up too high on my waist.
All in all I’m happy, the stays are very comfortable and the rump seems like just the right bit of small extra.
I have wanted to make a quick and easy basic summer dress for awhile and when I saw this Hollywood pattern for sale last fall I just had to buy it. I had no particular fabric in mind nor really an idea of what I wanted other than the fact that I wanted to make this pattern.
Fast forward to the first warm summer days in May and I still haven’t figured out what I want to make so I go rummaging around my fabrics and find this extemely thin airy vintage cotton that I bought some time ago with no clear vision in mind. Well then looking through my ribbons I notice I have a matching yellow velvet ribbon for the ties. So I toss the fabric in the wash so I can start working on my new summer dress thinking I’ll be done the next day…
The envelope promises you it’s a sew simple design. Well yes very simple, just an a line dress with extra fabric in the front piece that then gets gathered by the ribbon. But what they didn’t tell you is that it takes surprisingly long to actually do because of all the fiddling with tape placement to get the casings for the ribbon. Well since I had alot of historical sewing this summer and alot of me just being too tired to bother with anything it took basically most of the summer to finish! 😀 I like the finished dress and will probably wear it quite a bit but I don’t really think I’ll be making this pattern again anytime soon. I much prefer more challenging or quicker projects not something easy but that still takes quite a bit of time projects.
This pattern had for once really good instructions for shoulder pads though, a huge plus since most patterns will just tell you to make shopulder pads and attach them without telling you what kind or how or how much stuffing. From the pattern picture I was not expecting huge shoulder pads but as it turns out this one has the biggest I’ve ever made.
I was kind of rushed for these pictures and only afterwards realized this one would have come across better on a background with stronger contrasts than a sunny lake since it is so light in it’s candy colors. But with this one I’m going with the costuming mantra of better done than perfect. lol
Also apparently I need to wear a full slip with this one as this part of the 40s has such a short hem all my half slips are a tad too longThe hat is vintage 30s and shoes are modern rieker (thirfting find) in a very convincing 40s look, I’ve found a few styles from them that look very vintage and they are always super comfy to wear.
Since I’ve made everyone else in my family 18th century clothing ofcourse I made a dress for my daughter as well. The first thing she said about it was NO poofy sleeves! Well luckily 18th century doesn’t really do big poofy sleeves and since our oufits are all about 1770s/80s sleeves were quite narrow with just ease for movement, no extra room anywere. Looking through paintings and extant gowns from the time period she settled on this one saying it was like Elsa’s dress and she wanted it.
I actually found the perfect silk brocade for it but since the dress I was making her was for a picnic it felt like asking for trouble, we went to ikea to buy a bedsheet for fabric. At home we had settled on this one:
The idea was that I’d dye it a light blue to give a similar though less shiny look as the original. When we got to ikea in the entrance hall they had a huge display full of their newest bedsheet design blagran and my daughter instantly fell in love with it and asked if it would work for the 18th century.
The color is right and overall design is good as is the space between the design, not too crowded but I am not sure they did that tie dye type thing yet. Since so many points on this are good and since we do picnics and such, historical costuming or living history events rather than strict accuracy renactments we went for it. I bought the smaller duvet size and started making it.
Being in europe I had the same problem as I did with my sons costume, most companies selling kids patterns are in the US and with shipping costs they become rather expensive for the casual costumer… so once again I made my own pattern based on pictures of garments and my adult size italian gown. It was actually fairly simple to draw because of the lack of curves.
I first drew out the front, drew in the lines for the back pieces. As you can see I had to draw out the neckline several times before getting the right line to it.
After I was happy with the shape of the pattern pieces I drew them out again onto separate pieces so that I could cut the fabric. I used a fairly heavy linen tablecloth for the bodice lining and a thinner one for the sleeves. The idea behind using a fairly thick lining with lots of body to it was that since she didn’t want stays, the lining would give her a smooth appearance mimicing that of stays but with out the rigidity that is foreign to a modern child.
The shift fabric got lost in mail so we did the fittings over a vintage dress she was wearing that day since a childs dress is back lacing and quite adjustable anyways the difference in bulkyness didn’t really mater as long as the proportions were right. First try it had pretty much a perfect fit so then onto cutting the fashion fabric and sewing the entire thing. I machine sewed some of the non showing bits and hand sewed the rest.
the only thing that I really changed was re drawing the lower edge so that the skirt would floof out at a better angle closer to her natural waist. I made the entire thing a bit long on her so that the torso wouldn’t become too short once it came time to release some of the growth pleats
The shift fabric was still missing 3 days before the event (that we actually didn’t make it to because on the day she had a fever) so at that point I just grabbed a thinner vintage table cloth I had in my stash and quickly machine sewed with french seams (not historically accurate but works well) a shift for her.
I was very rushed at places with this project and it kind of shows in my stitches if you look closer. The over all look is good though, so I’m pleased with it and she is happy and that is all that really maters anyway. I would really love to still make an under petticoat to give the skirts a bit more volume but for now she didn’t want one so I’ll wait a bit for her to get more used to historical fashion and then ask again. 🙂
As far as the back construction is conserned I couldn’t find any blogs or anything with instructions on girls gowns so I just guessed based on pictures I found. I made the eyelet strips out of a hemp twill I had and sewed them onto the inside of the gown. There is metal boning on the back edges to keep the gown trimm looking and not warping with the lacing. The skirts have a bias tape at the top edge and the very front bit is left separate from the bodice while the back is sewed on and the back seam opened so that the edges can fall down like on a italian gown. The sleeves are left unfinished again like in an italian gown. The growth pleats are eye balled into place and ironed, then sewn with a fairly long running stitch for easy ripping open once she grows enough.
slightly messy insides are completely historically accurate so I don’t feel bad about them the front were the bodice and the skirt are separateAnd tah dah! The messiest stitches in the most noticable place at the waist 😀 Very different sewing quality at the neck were I still thought I was doing ok time wise Here is the hemm and the growth pleats, the flower vines lined up quite nicely
Next time I make this I think I’ll make the skirt with a separate bib type front skirt piece that ties at the back waist, like typically in a round gown as this construction was fiddly. I actually buyed the lace I used for our 1880s outfits for this one to use at the neck and sleeves but she desided she would rather me leave those out and keep this one plain.
This project used up a little under half of the smallest size duvet cover and is about a size 8 or 9 years with the growth pleats opened maybe even slightly longer so a very cheap project as the lining linens and shift linen were already in my stash, total cost being the 14,99€ I paid for the duvet cover.
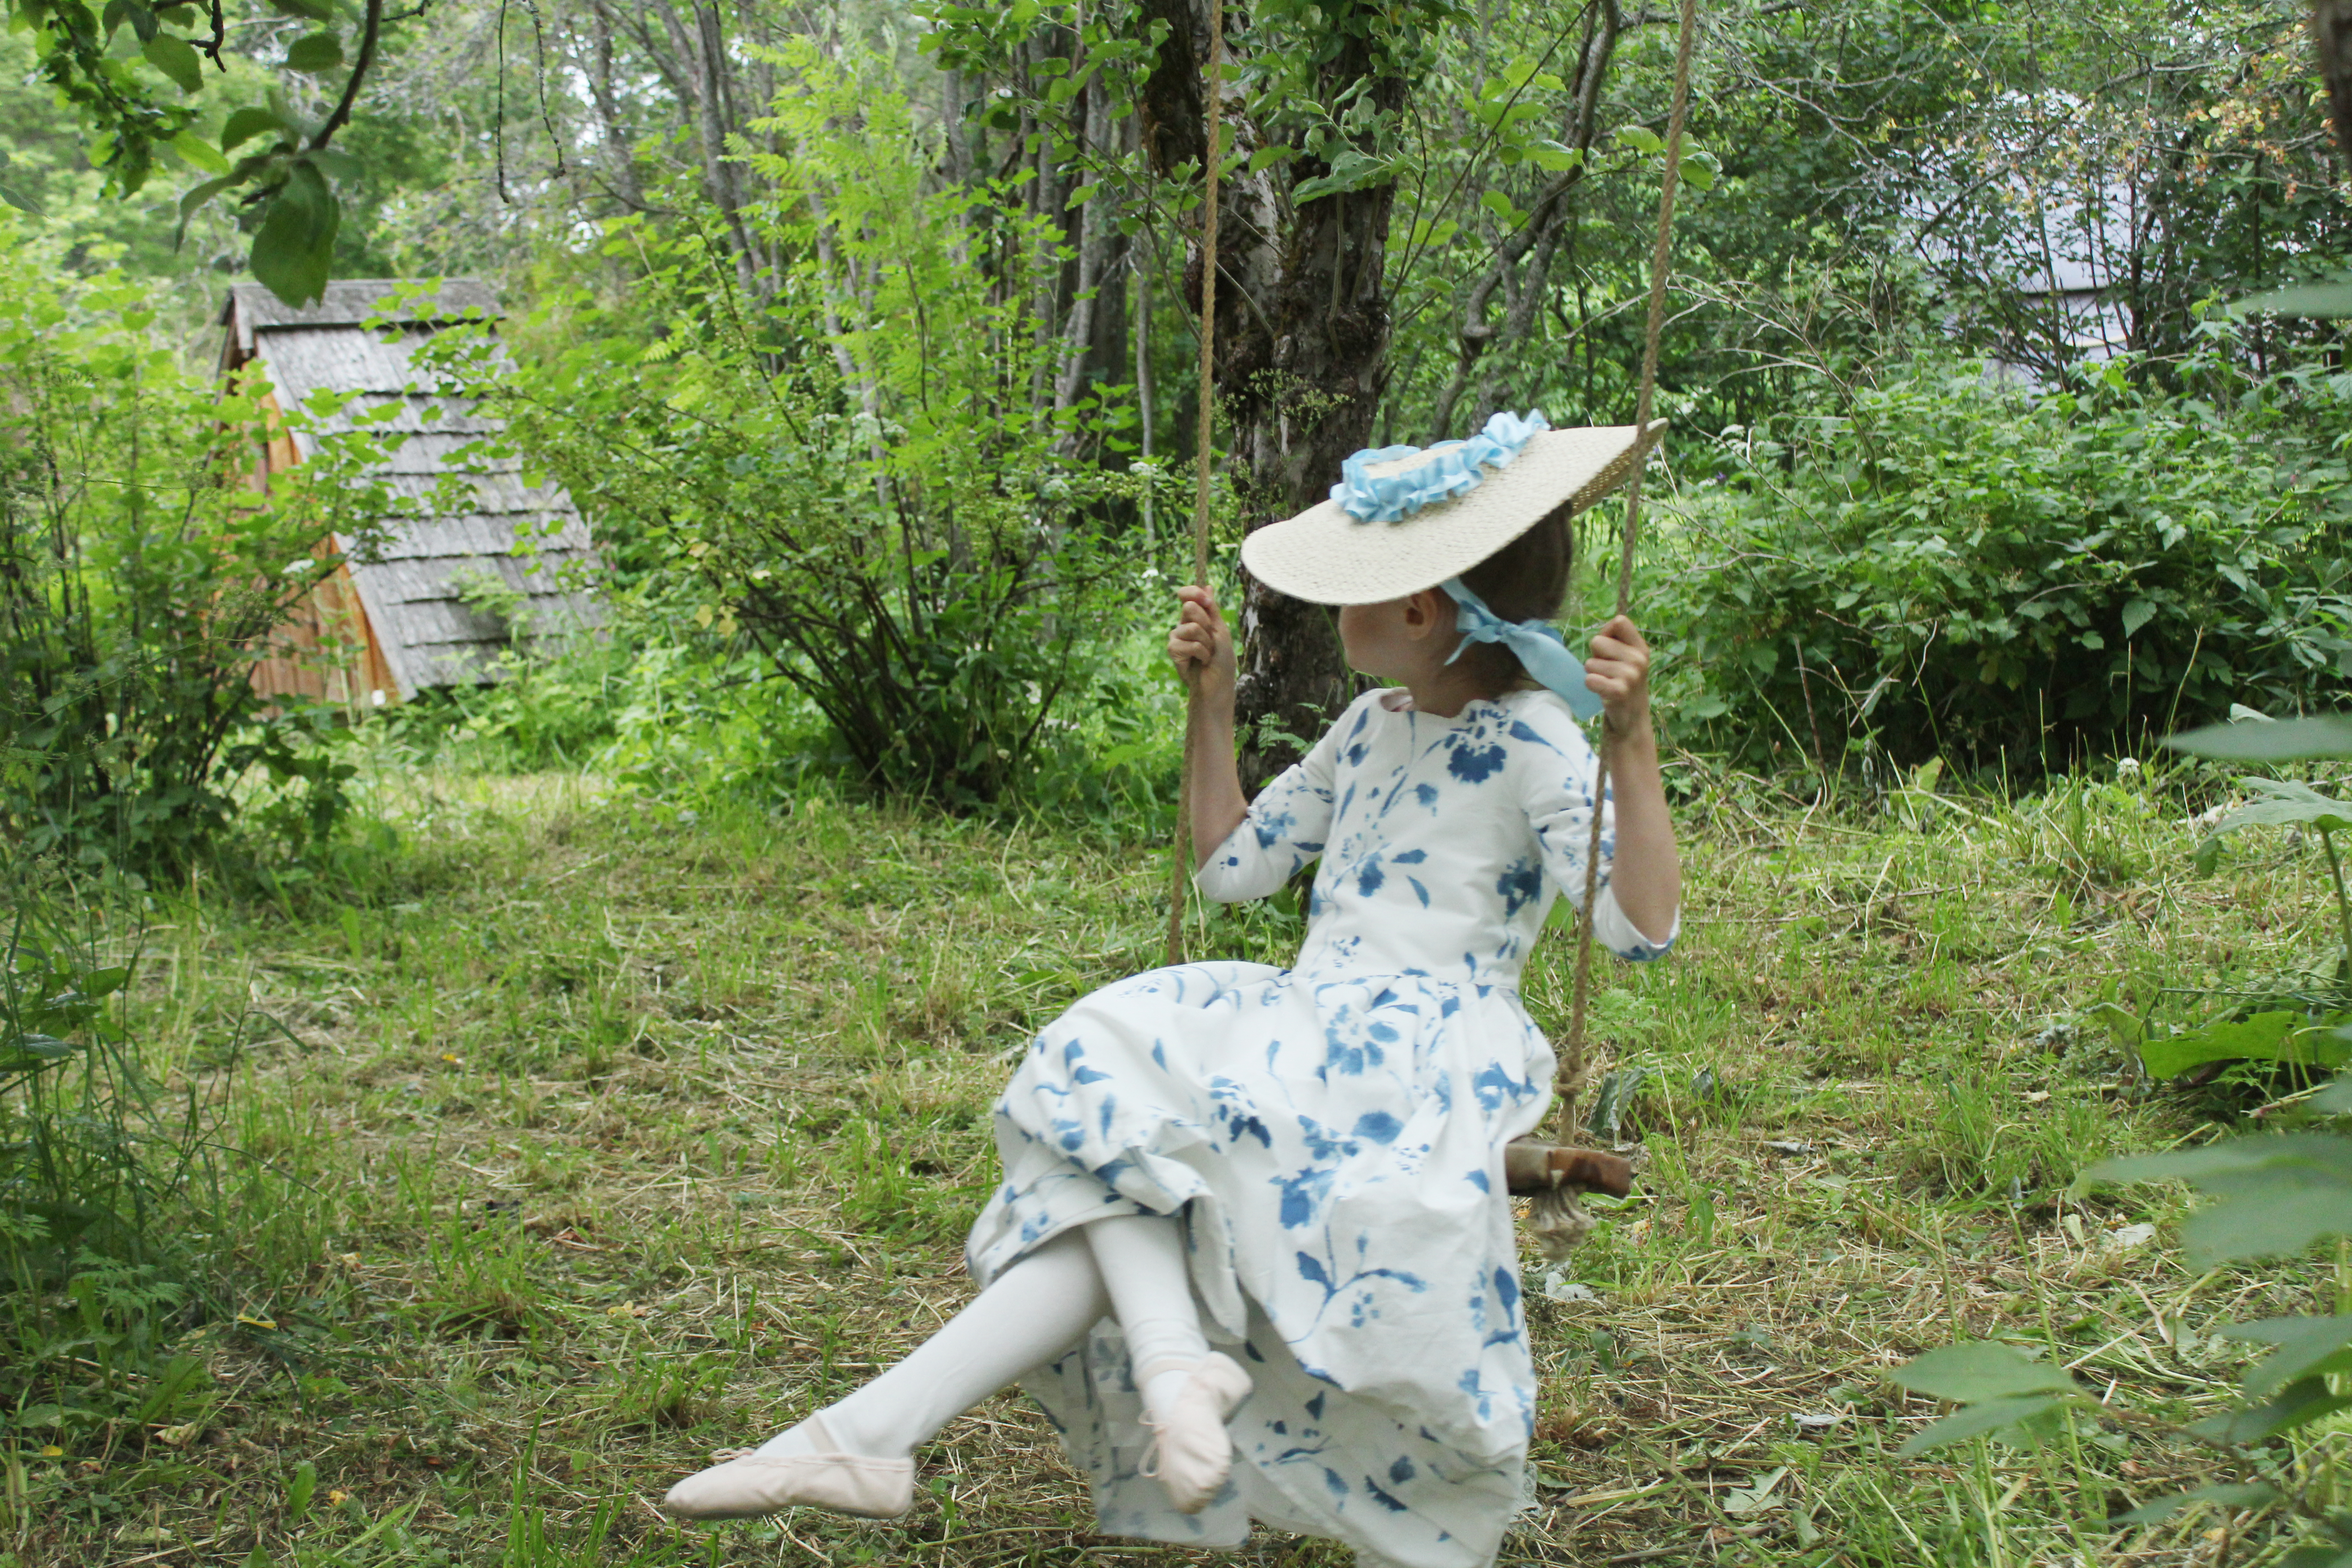
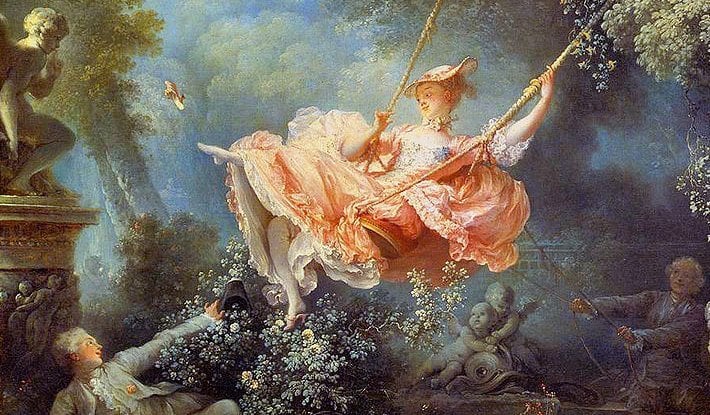
I’m off to work on my next project, a 1780s round gown. Till next time enjoy the pictures we took in our garden and my version of the famous rococo swinging painting! xxx
It’s been a busy week and I’ve been procrastinating with writing this. Last weekend we had a little meet up with fellow costumers for a tour at Milavida, a russian aristocrat’s home from the 19th century. The second floor is a museum and the first a beautiful cafe. We went on a guided tour of the museum and after for some coffee and cakes and costuming talk, such a wonderful afternoon. I wore my 1780s caraco I made last fall as my first venture into the 18th century. Apparently I have lost some weight since then and my caraco was gaping a bit at the front so I had to safety pin it shut but that made the neckline gape at my shoulder straps, luckily the kerchief covered that 🙂 but it is something I’ll have to fix for future wear.
here is the caraco when I wore it last fall
This time I wanted to wear the caraco with proper accessories that give every costume that authentic flare. First up was a kerchief to protect from the sun and be more modest during the daytime as 18th century dresses can be quite giving esp if you are more amply endowed. I want to make a super fancy one with white work emboidery and everything but for now I just stuck to the basics and made a linen triangle shaped one out of a very fine thin linen. It’s hand roll hemmed with linen thread. Not a super exciting project but it was quick to make and moulds to your neck very well and really does keep you cooler in the sun. It was a very hot day and the museum had no air con so a fancy silk one would have been drenched in sweat!
The second thing I made is a straw bergere hat. Well actually this one I made for my daughter (she helped with the blocking part) but it went well with my caraco so instead of making a new one in a hurry I just used it. I do need to make myself one to wear to a picnic next month though, since she will need this one for herself.
I bought a plain 100% paper straw hat from h&m, we cut the crown about an inch up from the brimm and cut a piece off the crown piece to make it more shallow. Then I wetted the remaining top bit and stretched it around a bowl and we dried it.
After the top had dried I went with the oh so historic construction of hot glueing the crown to the brimm. Since the hat I used was completely woven instead of a sewn braid it frayed alot and would have been a pain to sew on.
Then came the trimming. My daughter chose a light blue satin ribbon and I first basted a gathering thread through the center of the ribbon and folded those gathers into box pleats that I sewed onto the glued edge. After that I attached a piece of ribbon onto the inside of the crown so that the hat could be tied on your head.
I feel for me personally the brimm could be slightly bigger but since this one is actually meant for my daughter it doesn’t really mater since she is 7 and would get swamped under a huge brimm anyways.
Actually I did make a pair of white stockings to wear with this too but since I’m currently embroidering them I’ll post a separate post on them once they are finished. 🙂
I’ll leave off with some (a ton of) pictures of the entire look and hair under the hat, till next time! xxx
my hair is rolled on top into 3 rolls and the sides are rolled on their own and the back is curled and tied with a blue satin ribbonnot the best angle for these but my shoes are curled toe egyptian souvenir mules, not maybe 100% accurate but comfortable and good enough for me
About a month ago I ordered materials for my 1870s/80s corset so that I could make my natural form outfit for a living history day event this past weekend. Since it was a morning/day event 2 hours away I reqruited my mom to help with the driving by promising to make her an outfit for the event aswell. My kids ofcourse loved the idea of strolling around in the 19th century so I promised to make them something on top of everything else. Well the corset materials got lost in the mail and are still MIA when I am writing this on Tuesday after the intended event. So after waiting for them waaaayyyy too long and having to make the 18th century kids clothes for the weekend before I had only 5 days to make everything. With the time limit I had to scale things back. I made the adult outfits so that trimmings and other details could be added on later and made the kids clothes good enough from a distance with the plan of remaking them better later. My kids enjoy these sort of clothes anyways so they will get plenty of everyday use out them so they don’t go to waste :).
Here are some of my original insipation pictures 🙂
My kids left for gramma’s house on monday and I got to sewing very very long days to get everything finished. I had the chemise and drawers already, mine are from turn of the century, my mothers were slightly later. She wore a 20th century corset since I didn’t have time to make her one. My corset is more of a wearable mockup than anything else since the materials didn’t come in time and I didn’t even have time to finish it completely. I’ll make a separate post on that one later when I finish the binding on it.
The skirt pattern was easy enough and I made both our outer skirts and petticoats using the same pattern. Both our petticoats are made out of vintage bedsheets, my skirt is made with ikea cotton as that was budget friendly and came in the color I wanted. My mothers skirt is cotton sateen that I found a remnant bolt of on sale at a local fabric store. All of the seames on all the skirts are french seamed since I wasn’t a 100% sure about the historically correct way of finishing the seams.
Apparently I forgot to take proper back shots of our skirts
The bodice gave me more of an headache. On the pattern the shoulders are very wide, I mean so much so that I had to take them in several inches even on my mother who usually has issues with things being rahter tight in the shoulder/upper arm area. Since I am narrow backed, narrow shouldered and short backed for my size I made the back with 1.5″ seam allowances and 2″ at the shoulder and took in the shoulder length almost by half. I completely ignored the front darts and pinned them onto the body once everything was pieced together. Again on mine my fabulous husband did the pinning on my body, he luckily is always willing to help and has become very good at pinning things and smoothing the fabric properly though he has no real interest in sewing or fitting things. The fabric on mine is a repro 19th century cotton and my mother’s is a rayon blend fabric I thrifted. The buttons on both are early 20th century vintage from my collection and the lace on my mother’s is a linen bobbin lace I bought for my daughters 18th century dress.
sorry for the odd face but the darts show well in this one and no i am not wearing winged eyeliner my lashes just make it look like that 😀here are the buttons and lace show on my dress from detail shot of the pattern on mine
My daughter ended up wearing the linen shirt I was making for my son, I just added waist darts and lace at the neck instead of a collar. The skirt is just a hastily shaped piece of fabric with a tie at the waist. I did make her proper drawers though out of linen and linen lace, the legs are left loose because she doesn’t like anything tight on her legs. My sons shorts ended up being tighter than I expected so they have a more modern or slightly out grown fit. His shirt is just a modern shirt since I ran out of time and he had a bow too but that was forgotten at the bottom of my bag all day 😀 These kids outfits I’m really not pleased with and they are more historically inspired than anything else, next time I’ll do better. Shoes are vintage 70s, I was going to make them something more proper but again no time and really I should buy lasts before attempting boots.
sorry for the wrinkles I didn’t remember to take pictures before the long sweaty day of wear
So here all 4 outfits in 5 days! 🙂 The ladies dresses I’m actually pleased with given the time limit and with more time I’ll make them what I wanted.
Till next time! xo
I love this picture, it reminds me of Mary Poppins 🙂my gloves and hat are vintage 30s I’m not sure if the hat is quite right but since I didn’t have time to make anything I decided it was good enough. we got to take a carriage ride at the event The event had people dressed up in 1880s to 1910s so here you can see a bustle dress along with our outfits
Our family’s journey into the 18th century continues. This time I made my nearly 6 year old son a suit. Looking for patterns I ran into the problem of having to buy a separate pattern for all parts except the shirt and that was easy enough to guestimate scale down from the adult version I made with these instructions http://www.marquise.de/en/1700/howto/maenner/18hemd.shtml for my husband. So instead of spending nearly 60 on patterns plus shipping I decided to make my own based of the adult versions.
The pants are patterned by taking the pattern I used for my husbands breeches (the simplicity pirates of the caribbean pattern) and put them over a modern pattern, well modernish since I used a pattern for 30s slacks, to see the differnce in the shape. Basically the breeches have a big center curve in the front similar to modern backs and in the back there is basically none but a slope upward curving down to waist. I took a pattern I have previously used to make the kids some straight leg pants and used that as my guide for drawing out the new pattern with similar changes as the adult versions had. The fabric is a cotton twill I thrifted not knowing what to make out of it that he instantly fell in love with.
Here the modern pattern is in the middle, the breeched back piece behind everything and the front on top so you can see how they work
My son though only 5 loves fiber crafts and wanted to embroider his own buttons for his pants. We looked up pictures of embroidered buttons online and he chose this one.
I slightly simplified the design and drew in onto his fabric and he embroidered it by hand with silk thread.
The waistcoat I modeled on top of a modern vest pattern again useing the waistcoat I made for my husband from the simplicity pattern as a guide. That involved changing the shoulder seams further back and rounding the front seam and angling the lower part of the front towards the back. The fashion fabric is tea dyed Ikea bedsheet I had left over from my caraco and the back and front lining are unstained bits of stained vintage linen tablecloths.
here you can see the original vest lines and how I changed them
For the coat I used this picture as a guide on top of a modern kids pattern again.
The sleeves on the modern pattern were ofcourse one piece and with no elbow curve so I drew it out, cut it into 3 pieces to give me the right piece for the upper part of the sleeve and taped the left over pieces and redrew them to give me the under part of the sleeve. since modern sleeves are looser I also tapered the sleeve a bit to give it a more correct fit. Then I measured were my sons elbow goes and drew it out in a similar angle as the picture. With all this guess work things could have gone badly wrong but luckily it didn’t. Everything fit with only one tiny alteration to the center back seam of the coat to better hug his body instead of hanging limply off him.
Drawing out the sleeve was the hardest bit
Unfortunately I was so much in a hurry to finish that I completely forgot to take anymore process pictures for the coat. It is unlined as summer is coming on fast and my son wished that I make him another one out of wool for when it gets colder and that that one would have a flower lining, so next time more about the process on that one. 🙂
The shirt fabric was stuck in mail for very long so when it finally came I had only 2 evenings to finish it along with finishing up his coat and his sisters dress. So what does a sane person do? Probably would decide that since the other items are atleast partly machine sewn that the shirt should be also. Well since apparently I have a death by sewing wish I sewed the thing by hand! To save time inseat of flat felling my seams I did then in with mantua makers seams instead. I’m not sure if this would be historically accurate for mens shirts but since it’s quick, gives a neat finish and was used in womens clothing at the time I went with it. I’m totally in love now with this seaming technique! The shirt was indeed all sewn up in 2 evenings! Basically the idea is the you turn your seams twice so the raw edge is folded inside the seam and the you hem stitch the fabrics and the folded edge together securing the edge and sewing the fabric together in one neat easy stitch. The buttons are linen tread buttons I made using this tutorial https://fabricnfiction.com/2018/01/31/tutorial-thread-shirt-buttons/ As for the neck I showed him paintings with different style neck closures: buttons, ribbons and links, he chose the ribbon.
Apparently I forgot to cut some thread but we’ll pretend that isn’t there 😀these breeches needed some pieceing at the waist and in my hurry I did a pretty horrible job at that, they’ll be better next time I make them
Other than a few minor details the entire outfit turned out great and for now they are good enough, next time I make them they will be even better. 🙂 My daughter got sick so we didn’t make it to the picnic these were intended for but since he loves them so much and left wearing them to grandma’s house for a few days I am not too worried about them getting lots of use yet. But for now I’m off to sewing my first dabble into the 19th century, Till next time! xxx
The felt tericorn is a wool felt hat from H&M with the brim sewn up to make a tricorn. Completely by lucky accisent the same color as the suit since the hat was a part of a halloween cvostume 2 years ago.


